If you’re not quite ready to pay for a full blown site, your Google listing is your go-to friend to create your free website for personal or business use. Google Sites lets business owners customize their websites without any technical know-how by choosing from free templates and themes.
This article will guide you on how to make your own Google site from the ground up. We will also share helpful tips on how to add content and optimize the settings for SEO purposes.
How Does It Work?
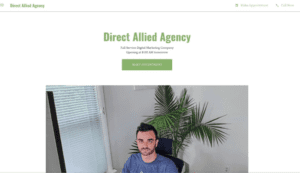
Inside your Google Business Profile (business.google.com), you can quickly launch a free mobile-friendly website to promote your company.
Google will seamlessly use the information from your profile to generate a website that you can personalize with themes, images and text. Whenever you change your business information or add new images, your site will be updated instantly.
How to Create a Google Site of Your Own
If you don’t already have a Google Business Profile (formerly “Google My Business”), create a separate Gmail account for your listing to ensure that all notifications do not get mixed up with your personal mail. Once you sign in to your Google account, head over to the Google Sites homepage.
NOTE: This process is much easier to do on a desktop computer.
- Click on the “Website” option in the sidebar, and voila, your new site will automatically be generated.
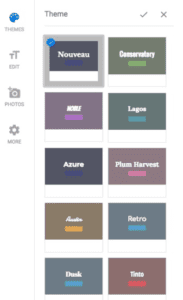
- Then, choose your preferred free template. Clicking “Themes” will show you all the templates and header image styles that Google Sites have. Search through the preset theme options with different color palettes and font style and choose the best design for your new site.
3. In the top-left corner of the page, you’ll establish your web address. By clicking the pencil icon you can enter site name, or even use your target keyword as your URL. You can even assign a domain you already own here, or purchase a new custom web address to use instead.
4. After you establish your web address, head over to the “Edit” section on the left side of your computer screen and change the following:
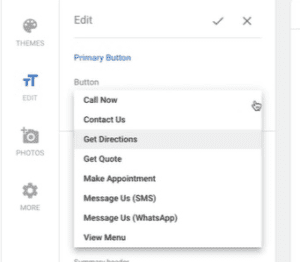
- Primary Button: Choose the option that fits your preferred call to action. You can see in the page preview exactly where the button will be placed. Once you publish your site, check the preview option to see how it works:
- Title: Update elements in the pages tab like “Headline” and “Description.” You may want to include your target keyword in your website text headline.
- Description: The following text boxes are really useful for quickly describing your website to new users and customers. Use this Description area to describe your operation. You should try to type your location and some keywords in the editor for better search results.
- Summary Header: The free website gives you this important text area to really explain more about you. Use this 40 character editor as another headline to introduce this section. A good example would be, “You Can Trust Our Denver Marketing Firm.”
- Summary Body: You can add content here to create unlimited text that a website visitor might find helpful. Easily add tutorials, instructions, or anything else that will help you sell your products or services. You should embed links to reference other websites, articles or pages using hyperlinks to any URL. This is prime real estate on the internet, so use it wisely.
- Photos: Clicking in the website preview on the screen, you can choose a large banner image to show up on both your business profile on Google and website. You can select a file from your Google Drive. Go to site preview and click edit header photo if you want to change your cover photo.
What Are These Settings At The Top Right?
The following information comes directly from your Google profile:
- Get Directions: It opens directions to your address from the users’ location on a map.
- Call Now: It initiates a phone call to your office from a mobile device or computer.
- Get Quote: Opens a form for users to inquire about your services.

Optimizing Your New Site
Inside your main profile you’ll see lots of settings on the page. These items are automatically shown on your free site, so they should be set up and stay updated all the time.
Posts
You can promote your business, post updates and new deals by utilizing the posts option. You can rewrite your existing blog articles to fit the text fields if you want. Some people use this tool to cross-reference social media platforms and YouTube videos.
Photos
One of the unsung heroes of your account are pictures, which are used all over the internet because they easily show up in search engine results. Be sure you stay active in posting new pics, logos and more in this section, because they show up as an image carousel on your site.
Business Information
Manage your business information, particularly your name, location, operational hours, contact number, and category. You can add customer feedback to your website if you want to.
Menu Items
You can organize your products and services in your profile as well. Restaurants may find an option to list their menu items.
Reviews
Manage and respond to your public reviews as these are also displayed in the web page.
To optimize your site and save time, Google occasionally updates the website visual design. If you have pages that you forgot to include in your site, go to the ‘Insert’ tab.
Publish Your Google Site
The final step after you’ve added all the necessary content to your site, hit the publish button in the top-right corner. When you see a pop-up box, choose the URL you want. However, by default, every Google Sites URL will display “https://yoursite.business.site.”
Important Note IF you already have a live website: When you see the check box that says “Make this website address on Google search and maps,” always leave it unchecked.
This is to ensure that your official domain name will not lose its potential traffic in case a visitor clicks on the listed web address. If you have a custom URL already, edit the “Custom URL” area. You can tweak the settings to access your site, and if it should show on search results.
Once finished, click “Publish” again to set your site live and make it visible to others.
Ready to make your own free site? Hit us up at Direct Allied Agency if you have questions.